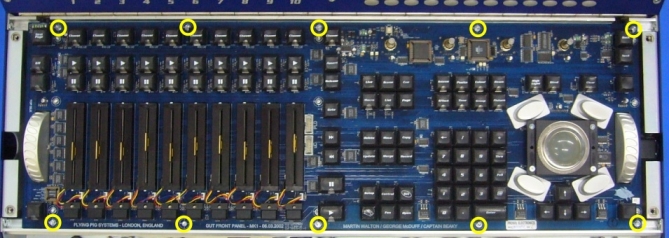
[vc_row][vc_column width=”1/3″][vc_single_image image=”3572″ css_animation=”appear” border_color=”grey” img_link_target=”_self” img_size=”full”][/vc_column][vc_column width=”2/3″][vc_column_text]This tutorial is for the WHOLEHOG 3 console.
Originally written in 2007.[/vc_column_text][vc_button title=”Download PDF Version” target=”_self” color=”btn-primary” icon=”wpb_document_pdf” size=”btn-small” href=”https://vd4bc0b0xc9.c.updraftclone.com/pdf/hog/Hog3_HDD.pdf”][/vc_column][/vc_row][vc_row][vc_column width=”1/1″][vc_text_separator title=”BEFORE YOU START” title_align=”separator_align_left” color=”blue” style=”double”][/vc_column][/vc_row][vc_row][vc_column][vc_column_text] – Disconnect power to the console
– You may wish to lay a protective cover on the touchscreens so that they are not damaged.
– Obviously, you’ll need to have your show files saved to an external drive. You can load them on to this new drive after the installation.[/vc_column_text][/vc_column][/vc_row][vc_row][vc_column width=”1/1″][vc_text_separator title=”Opening the Console” title_align=”separator_align_left” color=”blue” style=”double”][/vc_column][/vc_row][vc_row][vc_column width=”1/2″][vc_column_text]1. Loosen the set screws of all 4 encoder wheels with a 2mm hex key. You can then pull them straight up off the shaft.[/vc_column_text][/vc_column][vc_column width=”1/2″][vc_single_image image=”3550″ border_color=”grey” img_link_target=”_self” img_size=”full” alignment=”right”][/vc_column][/vc_row][vc_row][vc_column width=”1/2″][vc_column_text]2. Remove the fader caps by pulling each directly upward. Leave the faders at around 50% (this prevens scratching or other damage when removing/replacing the front panel).[/vc_column_text][/vc_column][vc_column width=”1/2″][vc_single_image image=”3553″ alignment=”right” border_color=”grey” img_link_target=”_self” img_size=”full”][/vc_column][/vc_row][vc_row][vc_column width=”1/2″][vc_column_text]3. Use a 4mm hex key to remove the 4 silver screws holding the front panel in place. Remove the front panel and set aside.[/vc_column_text][/vc_column][vc_column width=”1/2″][vc_single_image image=”3555″ alignment=”right” border_color=”grey” img_link_target=”_self” img_size=”full”][/vc_column][/vc_row][vc_row][vc_column][vc_column_text]4. Use a 2mm hex key to remove all the outside screws/washers on the front panel.
5. Gently lift the front panel PCB (circuit board) up as you would a car hood. There are connections at the top of this board that can be damaged if pulled straight up. Please note that this circuit board is not hinged to the console. [/vc_column_text][/vc_column][/vc_row][vc_row][vc_column width=”1/1″][vc_text_separator title=”Removing the Old HDD” title_align=”separator_align_left” color=”blue” style=”double”][/vc_column][/vc_row][vc_row][vc_column width=”1/2″][vc_column_text]6. Locate the hard drive under the front panel PCB on the right side of the console. Disconnect power and data cables to the hard drive.[/vc_column_text][/vc_column][vc_column width=”1/2″][vc_single_image image=”3561″ alignment=”right” border_color=”grey” img_link_target=”_self” img_size=”full”][/vc_column][/vc_row][vc_row][vc_column width=”1/2″][vc_column_text]7. Loosen the 4 nuts holding the
hard drive retainers in place.
Remove the nuts and washers.
8. Pull the hard drive up and off of the posts.[/vc_column_text][/vc_column][vc_column width=”1/2″][vc_single_image image=”3562″ alignment=”right” border_color=”grey” img_link_target=”_self” img_size=”full”][/vc_column][/vc_row][vc_row][vc_column width=”1/2″][vc_column_text]9. Using a phillips head screwdriver, remove the four screws connecting the hard drive to the right angle retainers.[/vc_column_text][/vc_column][vc_column width=”1/2″][vc_single_image image=”3563″ alignment=”right” border_color=”grey” img_link_target=”_self” img_size=”full”][/vc_column][/vc_row][vc_row][vc_column width=”1/1″][vc_text_separator title=”Installing the New HDD” title_align=”separator_align_left” color=”blue” style=”double”][/vc_column][/vc_row][vc_row][vc_column width=”1/2″][vc_column_text]10. Use a phillips head screw driver to attach the right angle retainers to the new hard drive.[/vc_column_text][/vc_column][vc_column width=”1/2″][vc_single_image image=”3563″ alignment=”right” border_color=”grey” img_link_target=”_self” img_size=”full”][/vc_column][/vc_row][vc_row][vc_column width=”1/2″][vc_column_text]11. Connect power and data cables to the new hard drive.
12. Insert hard drive/holder on to the 4 posts.
Replace washers and nuts (secure tightly).[/vc_column_text][/vc_column][vc_column width=”1/2″][vc_single_image image=”3562″ alignment=”right” border_color=”grey” img_link_target=”_self” img_size=”full”][/vc_column][/vc_row][vc_row][vc_column width=”1/1″][vc_column_text]13. Replace the front panel PCB. Ensure all conections have been re-established.
14. Use the 2mm hex key to replace the outside screws/washers to hold the front panel PCB in place. [/vc_column_text][/vc_column][/vc_row][vc_row][vc_column width=”1/2″][vc_column_text]15. Carefully replace blue front panel.
Ensure that the faders have been left at 50% to prevent damage.[/vc_column_text][/vc_column][vc_column width=”1/2″][vc_single_image image=”3566″ alignment=”right” border_color=”grey” img_link_target=”_self” img_size=”full”][/vc_column][/vc_row][vc_row][vc_column width=”1/2″][vc_column_text]16. Secure the 4 silver screws using the 4mm hex key.[/vc_column_text][/vc_column][vc_column width=”1/2″][vc_single_image image=”3555″ alignment=”right” border_color=”grey” img_link_target=”_self” img_size=”full”][/vc_column][/vc_row][vc_row][vc_column width=”1/2″][vc_column_text]17. Replace fader caps by pressing them back on to fader.[/vc_column_text][/vc_column][vc_column width=”1/2″][vc_single_image image=”3553″ alignment=”right” border_color=”grey” img_link_target=”_self” img_size=”full”][/vc_column][/vc_row][vc_row][vc_column width=”1/2″][vc_column_text]18. Replace the encoder wheels and
tighten set screw using a 2mm hex key.
19. Reconnect power to the console.[/vc_column_text][/vc_column][vc_column width=”1/2″][vc_single_image image=”3550″ alignment=”right” border_color=”grey” img_link_target=”_self” img_size=”full”][/vc_column][/vc_row][vc_row][vc_column width=”1/1″][vc_text_separator title=”Formatting the New HDD” title_align=”separator_align_left” color=”blue” style=”double”][/vc_column][/vc_row][vc_row][vc_column width=”1/2″][vc_column_text]1. Insert the System Restore CD into the console’s CD drive (this file can be downloaded from High End Systems and burned as an ISO).
2. Power cycle the console while holding the ENTER or PIG key.
3. From the on screen menu, select “Full Install” using the arrow keys found on the console and hit ENTER. The console will prompt you to confirm this.
4. The process will then complete on it’s own. This will take a few minutes and you will not see a progress bar. It may appear as if the console is not doing anything. The install is complete when the Hog3 Start window is displayed.
[/vc_column_text][/vc_column][vc_column width=”1/2″][vc_single_image image=”3570″ alignment=”right” border_color=”grey” img_link_target=”_self” img_size=”full”][/vc_column][/vc_row]