[vc_row][vc_column width=”1/3″][vc_single_image image=”3588″ css_animation=”appear” border_color=”grey” img_link_target=”_self” img_size=”full”][/vc_column][vc_column width=”2/3″][vc_column_text]This tutorial is for the Hog iPC console.
Originally written in 2007.[/vc_column_text][vc_button title=”Download PDF Version” target=”_self” color=”btn-primary” icon=”wpb_document_pdf” size=”btn-small” href=”https://vd4bc0b0xc9.c.updraftclone.com/pdf/hog/Hog_iPC_HDD.pdf”][/vc_column][/vc_row][vc_row][vc_column width=”1/1″][vc_text_separator title=”BEFORE YOU START” title_align=”separator_align_left” color=”blue” style=”double”][/vc_column][/vc_row][vc_row][vc_column][vc_column_text] – Disconnect power to the console
– Disconnect all monitors, external devices keyboards, widgets, etc.) and remove the main console portion from the roadcase.
– Obviously, you’ll need to have your show files saved to an external drive. You can load them on to this new drive after the installation.
Note: Some iPCs contain a SATA HDD while others contain an IDE HDD. Be sure to replace with the correct model of hard drive.[/vc_column_text][/vc_column][/vc_row][vc_row][vc_column width=”1/1″][vc_text_separator title=”Opening the Console” title_align=”separator_align_left” color=”blue” style=”double”][/vc_column][/vc_row][vc_row][vc_column width=”1/1″][vc_column_text]1. Use a 4mm hex key to remove the 4 silver screws holding the front panel in place (encoder wheels and fader caps need not be removed).
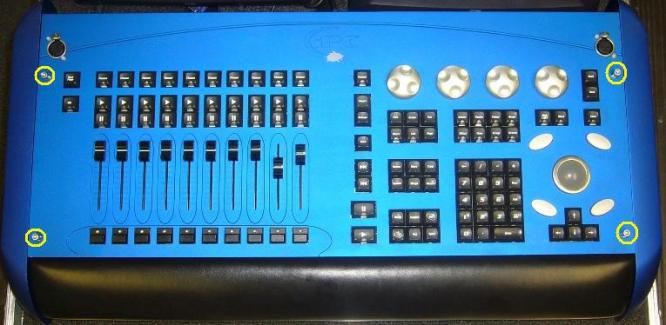
[/vc_column_text][/vc_column][/vc_row][vc_row][vc_column width=”1/2″][vc_column_text]2. Gently lift the front panel PCB (circuit board) as you would a car hood (there are connections at the top of this board that can be damaged if you pull straight up). Please note that this circuit board is not hinged to the console.[/vc_column_text][/vc_column][vc_column width=”1/2″][vc_single_image image=”3577″ border_color=”grey” img_link_target=”_self” img_size=”full” alignment=”right”][/vc_column][/vc_row][vc_row][vc_column width=”1/2″][vc_column_text]3. Disconnect the cables from the front panel PCB set the front panel aside.
***Note where each one will be replaced when rebuilding the console.[/vc_column_text][/vc_column][vc_column width=”1/2″][vc_single_image image=”3578″ alignment=”right” border_color=”grey” img_link_target=”_self” img_size=”full”][/vc_column][/vc_row][vc_row][vc_column width=”1/1″][vc_text_separator title=”Removing the Old HDD” title_align=”separator_align_left” color=”blue” style=”double”][/vc_column][/vc_row][vc_row][vc_column width=”1/2″][vc_column_text]4. Disconnect the cables from the CD drive and the hard drive. Hard drive is located beneath the CD drive. Both drives are mounted in the same retainer. The CD drive has 3 connections and the hard drive has 2 connections[/vc_column_text][/vc_column][vc_column width=”1/2″][vc_single_image image=”3579″ alignment=”right” border_color=”grey” img_link_target=”_self” img_size=”full”][/vc_column][/vc_row][vc_row][vc_column width=”1/2″][vc_column_text]5. To remove the HDD/CD drive retainer, carefully raise the console up and remove the 4 screws on the right half of the underside of the desk. Use caution so that the drives do not fall out, or cause damage to the other PCBs inside the console.[/vc_column_text][/vc_column][vc_column width=”1/2″][vc_single_image image=”3581″ alignment=”right” border_color=”grey” img_link_target=”_self” img_size=”full”][/vc_column][/vc_row][vc_row][vc_column width=”1/2″][vc_column_text]6. Remove the CD drive and the hard drive from the console carefully.[/vc_column_text][/vc_column][vc_column width=”1/2″][vc_single_image image=”3582″ alignment=”right” border_color=”grey” img_link_target=”_self” img_size=”full”][/vc_column][/vc_row][vc_row][vc_column width=”1/2″][vc_column_text]7. Using a phillips head screwdriver, remove the 4 screws holding the old HDD in the retainer mount.[/vc_column_text][/vc_column][vc_column width=”1/2″][vc_single_image image=”3583″ alignment=”right” border_color=”grey” img_link_target=”_self” img_size=”full”][/vc_column][/vc_row][vc_row][vc_column width=”1/1″][vc_text_separator title=”Installing the New HDD” title_align=”separator_align_left” color=”blue” style=”double”][/vc_column][/vc_row][vc_row][vc_column width=”1/2″][vc_column_text]8. Insert the new HDD into the retainer and use a phillips head screwdriver to replace the 4 screws that will hold the HDD in place.[/vc_column_text][/vc_column][vc_column width=”1/2″][vc_single_image image=”3583″ alignment=”right” border_color=”grey” img_link_target=”_self” img_size=”full”][/vc_column][/vc_row][vc_row][vc_column width=”1/2″][vc_column_text]9. Replace the HDD/CD drives and connect power and data to the new HDD and the CD drive. The CD drive has 3 connections and the HDD has 2 connections.[/vc_column_text][/vc_column][vc_column width=”1/2″][vc_single_image image=”3579″ alignment=”right” border_color=”grey” img_link_target=”_self” img_size=”full”][/vc_column][/vc_row][vc_row][vc_column width=”1/2″][vc_column_text]10. Carefully raise the console up and replace the 4 screws on the right half of the underside of the desk that hold the drives in place. Use caution so that the drives do not fall out, or cause damage to the other PCBs inside the console.[/vc_column_text][/vc_column][vc_column width=”1/2″][vc_single_image image=”3581″ alignment=”right” border_color=”grey” img_link_target=”_self” img_size=”full”][/vc_column][/vc_row][vc_row][vc_column width=”1/2″][vc_column_text]11. Reconnect the cables to the front panel PCB.[/vc_column_text][/vc_column][vc_column width=”1/2″][vc_single_image image=”3578″ alignment=”right” border_color=”grey” img_link_target=”_self” img_size=”full”][/vc_column][/vc_row][vc_row][vc_column width=”1/1″][vc_column_text]12. Replace front panel to top of console and secure the 4 silver screws using a 4mm Hex key.
13. Replace power, monitors, cables and al necessary external devices to the main console. [/vc_column_text][/vc_column][/vc_row][vc_row][vc_column width=”1/1″][vc_text_separator title=”Formatting the New HDD” title_align=”separator_align_left” color=”blue” style=”double”][/vc_column][/vc_row][vc_row][vc_column width=”1/1″][vc_column_text]1. Insert the System Restore CD into the console’s CD drive (this file can be downloaded from High End Systems and burned as an ISO).
2. Connect a PS2 or USB keyboard to the back of the Hog iPC.
3. Power cycle the console.
4. When the console prompts you to “Press any key to boot from CD,” press a key on the attached keyboard (not the console’s front panel).
5. Wait for the console to prompt you for the type of install. Use the “TAB” key on your attached keyboard until “Full System Restore” is highlighted. Press “ENTER” on your attached keyboard. The console will ask you to confirm this.
6. Do not hit and keys or power cycle the console during this process.
7. After the hard drive has been reformatted, the console will need to restart. Do not take the CD out of the drive. Your console may need to restart itself more than once. Do not manually restart the desk.
8. When the console arrives at the Hog3PC start screen, you may remove the disk.
9. You will need to re-configure your touchscreens, time/date, etc.
10. You may now reload your shows on the hard drive. You can do this quickly from the “File Management” window in the iPC Configuration Panel.
[/vc_column_text][/vc_column][/vc_row]