[vc_row][vc_column width=”1/3″][vc_single_image image=”3294″ css_animation=”appear” border_color=”grey” img_link_target=”_self” img_size=”full”][/vc_column][vc_column width=”2/3″][vc_column_text]This tutorial has been updated for Hog4.
The complete Quick Start Guides are also available in PDF form below.[/vc_column_text][vc_button title=”Hog 3 QuickStart Guide” target=”_self” color=”btn-primary” icon=”wpb_document_pdf” size=”btn-small” href=”https://vd4bc0b0xc9.c.updraftclone.com/pdf/hog/Hog3-Quickstart.pdf”][vc_button title=”Hog 4 QuickStart Guide” target=”_self” color=”btn-inverse” icon=”wpb_document_pdf” size=”btn-small” href=”https://vd4bc0b0xc9.c.updraftclone.com/pdf/hog/Hog4-Quickstart.pdf”][/vc_column][/vc_row][vc_row][vc_column width=”1/1″][vc_text_separator title=”Launching a Showfile” title_align=”separator_align_left” color=”blue” style=”double”][/vc_column][/vc_row][vc_row][vc_column][vc_column_text]![]()
1. From the Wholehog Start window, select LAUNCH NEW SHOW.
2. Enter a name for your showfile in the SHOW NAME box (pressing the SET key will bring up an onscreen keyboard), click NEXT (on screen)
3. Click FINISH.
[/vc_column_text][/vc_column][/vc_row][vc_row][vc_column width=”1/1″][vc_text_separator title=”Connecting DMX Processor 8000s” title_align=”separator_align_left” color=”blue” style=”double”][/vc_column][/vc_row][vc_row][vc_column][vc_column_text]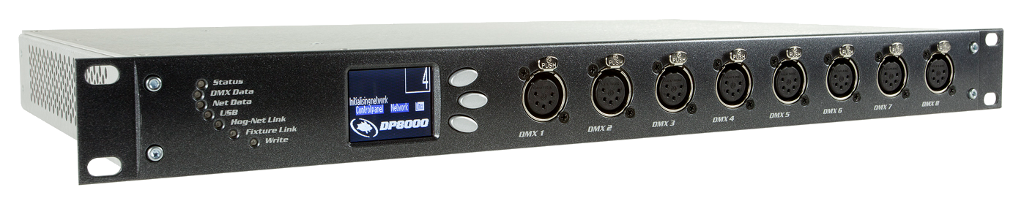
– If connecting one DP to your console, connect it via a CROSSOVER Cat-5 Ethernet cable.
– If you are connecting multiple DPs, then connect the console and all DPs to a network switch using patch (non-crossover) cables.
Once your DP is connected and the show is launched, the console will check the DP’s software version. If they do not match, the console will prompt you to upgrade the DP to match the desk. Simply follow the prompts on the console and the console will upgrade the DP.
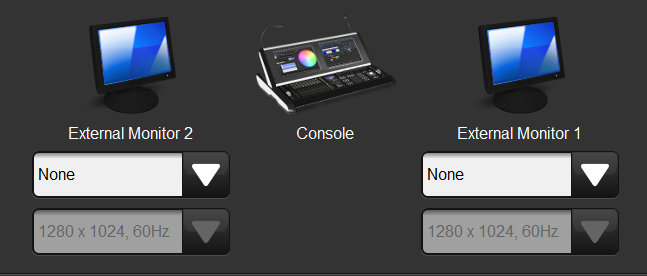
[/vc_column_text][/vc_column][/vc_row][vc_row][vc_column width=”1/1″][vc_text_separator title=”Connecting External Monitors and Calibrating Touchscreens” title_align=”separator_align_left” color=”blue” style=”double”][/vc_column][/vc_row][vc_row][vc_column][vc_column_text]1. Connect the monitor to the DVI adaptor on your console. If you are using a Touchscreen with a USB cable, be sure to connect that as well.
2. Press the SETUP key and select CONTROL PANEL from the main toolbar (bottom of the right monitor)
3. In the DISPLAYS tab of the Control Panel, select the type of monitor you’re using and pick a resolution from the drop down below.
4. Click APPLY
5. If the monitor is a touchscreen, press CALIBRATE TOUCHSCREENS and follow the prompts to calibrate all monitors including the external.
[/vc_column_text][/vc_column][/vc_row][vc_row][vc_column width=”1/1″][vc_text_separator title=”Opening Individual Windows” title_align=”separator_align_left” color=”blue” style=”double”][/vc_column][/vc_row][vc_row][vc_column][vc_column_text]
– Hold OPEN and press the key corresponding to the desired Directory window (Example: OPEN + GROUP, OPEN + LIST, etc)
– Hold OPEN and select a window from the Open Toolbar (bottom of the right monitor)
– Double tap the key corresponding to a Directory or Window (Example: BEAM BEAM, CHOOSE CHOOSE, etc)
– Press SETUP and select a window from the Setup Toolbar (bottom of the right monitor)
– Touch a View in the Views Toolbar (top of the left monitor) [/vc_column_text][/vc_column][/vc_row][vc_row][vc_column width=”1/1″][vc_text_separator title=”Manipulating Windows” title_align=”separator_align_left” color=”blue” style=”double”][/vc_column][/vc_row][vc_row][vc_column][vc_column_text]
![]()
1. Select the window you wish to move, resize, etc. (you can simply touch it to select it)
2. Touch the corresponding option in the Windows Toolbar (top of the right monitor)
[/vc_column_text][/vc_column][/vc_row][vc_row][vc_column width=”1/1″][vc_text_separator title=”Connecting Wings” title_align=”separator_align_left” color=”blue” style=”double”][/vc_column][/vc_row][vc_row][vc_column][vc_column_text] 
1. Connect the Wing(s) to the console using the USB cable, and connect power.
2. Press the SETUP key and select CONTROL PANEL from the main toolbar (bottom of the right monitor).
3. Select the WINGS tabs on the left side of the CONTROL PANEL
4. Touch any Playback bar’s dropdown menu and select your Wing via the Wing’s ID number.
5. Once selected, click the button with the lightbulb to ping your Wing. This will cause the Wing’s LEDs to flash letting you know it has been configured correctly.
6. Clicking the button to the right of the lightbulb will display a “Playback Bar,” which will show the contents of what has been recorded to that Wing on any given page.
![]()
Tip: If you are using a mini wing and would like to drag the Playback bar to an external monitor, click on the 2 vertical bars at the left side of the playback bar. This will undock the bar and you can then drag it to the external monitor. Drag and drop it to the bottom of the external monitor and it will re- dock itself. 
[/vc_column_text][/vc_column][/vc_row][vc_row][vc_column width=”1/1″][vc_text_separator title=”Connecting Widgets” title_align=”separator_align_left” color=”blue” style=”double”][/vc_column][/vc_row][vc_row][vc_column][vc_column_text] 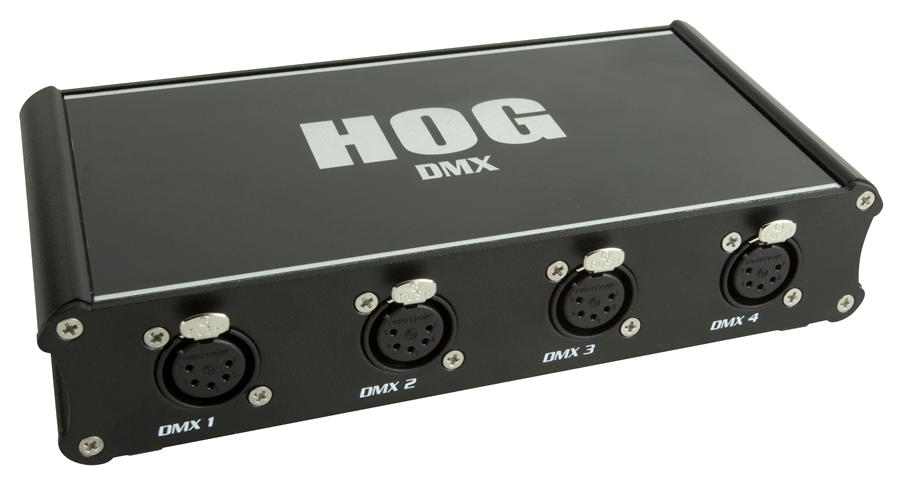
1. Connect the Widget or Superwidget to the console (Roadhog Full Boar, Hog iPC or Hog3PC on your computer) and connect power.
2. Press the SETUP key and select NETWORK from the main toolbar (bottom of the right monitor).
3. In the Network window, click on the Net # of the DMX Processor you are patched to. The cell will get a red box around it.
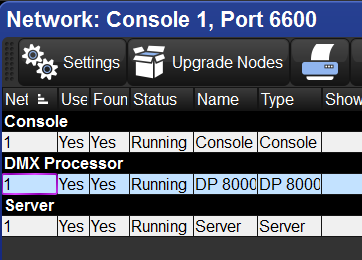
4. Click the SETTINGS button at the bottom of the window
5. In the pop-up window, select DMX WIDGETS
6. Click on the drop-down for the universe where you would like to assign your Widget and select your Widget’s ID.
7. Click OK.
Note: You will, of course, need to patch any or all fixtures in order to open Settings window.
[/vc_column_text][/vc_column][/vc_row][vc_row][vc_column width=”1/1″][vc_column_text css=”.vc_custom_1407378401619{background-color: #ff0033 !important;}”]
Next up…
[/vc_column_text][/vc_column][/vc_row]